- Home
- Blog
- How to Create a Museum Virtual Tour: A Complete Guide to Workflow, Implementation, Timeline and Best Practices
Virtual Tours · 8 min read
How to Create a Museum Virtual Tour: A Complete Guide to Workflow, Implementation, Timeline and Best Practices
Learn how to create a museum virtual tour from scratch—covering workflow, technology choices, timelines, and implementation tips for Indonesian museums.
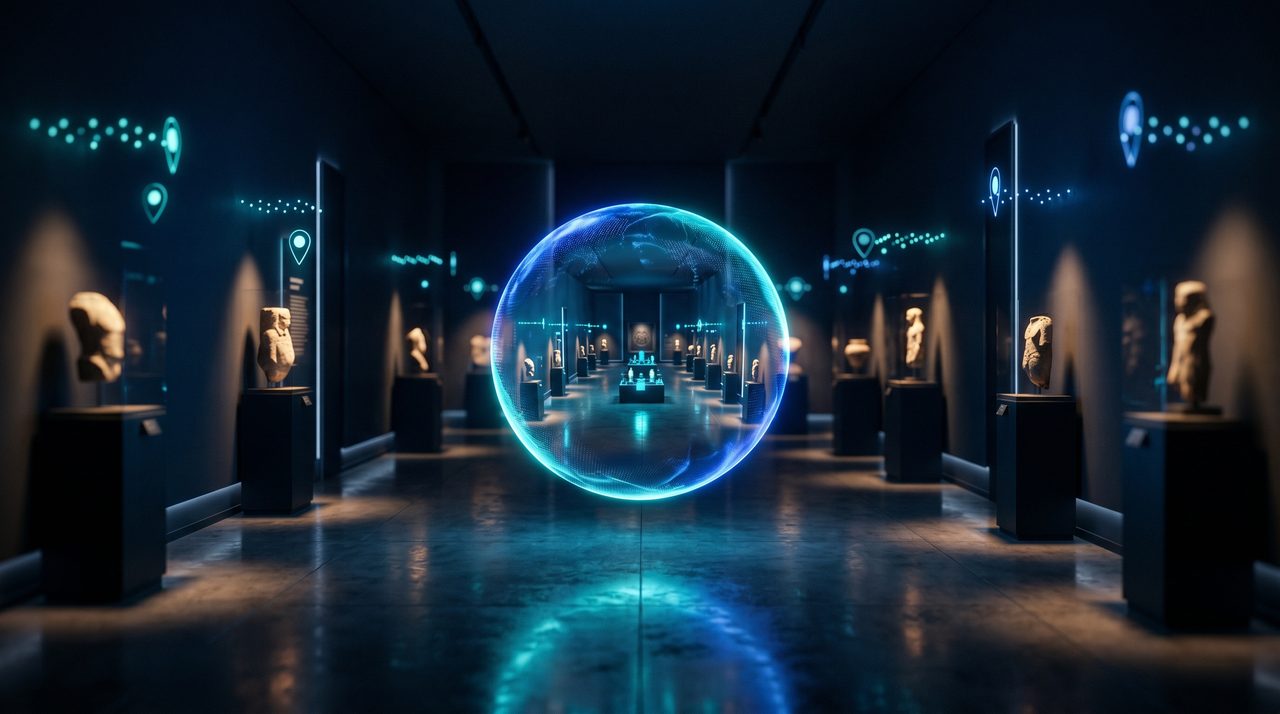
A museum virtual tour extends your institution’s reach beyond its physical walls, allowing students in Sumatra, researchers in Europe, and tourists planning an Indonesia trip to explore your collection from any device. For Indonesian museums navigating limited budgets, geographic barriers, and post-pandemic shifts in visitor behaviour, a well-executed virtual tour is no longer optional—it is a strategic asset. This guide walks through every stage of the process, from planning and technology selection through to launch and ongoing optimisation.
Why Indonesian Museums Need Virtual Tours
Indonesia is home to more than 430 registered museums, from the National Museum of Indonesia in Jakarta to regional ethnographic collections in Kalimantan and Papua. Yet physical attendance at many of these institutions remains constrained by geography, transport costs, and accessibility barriers. A virtual tour addresses all three simultaneously:
- Expanded Educational Access. Schools that cannot afford field trips to Jakarta can take their students through the National Museum’s Hindu-Buddhist artefact collection via a browser. Universities can embed 360-degree gallery views into course materials. Distance learning programmes gain a new dimension of visual richness.
- Greater Inclusivity. Visitors with mobility impairments, chronic illness, or sensory disabilities who struggle to navigate physical museum spaces can explore exhibitions at their own pace, zooming in on artefact details and reading hotspot captions without physical strain.
- New Revenue Streams. Virtual tours open monetisation opportunities: paid access for international audiences, virtual school excursion packages, digital membership tiers, and donation prompts embedded within the tour experience itself.
- Marketing and Collection Promotion. A shareable, embeddable virtual tour serves as an always-on marketing tool—appearing in Google search results, shared on social media, and featured in travel planning platforms without any additional spend.
Planning Your Museum Virtual Tour: Goals, Budget, and Legal Considerations
Strong execution begins with rigorous planning. Rushing into a capture session without a clear brief is the most common reason museum virtual tour projects run over budget and under-deliver on quality.
Defining Objectives and KPIs
Before contacting a vendor or purchasing camera equipment, articulate what success looks like. Is the primary goal increasing online engagement time? Driving physical visit bookings? Providing an accessibility alternative? Each objective leads to different technology choices, content structures, and measurement frameworks. Typical KPIs for a museum virtual tour include average session duration on the tour page, number of unique monthly tour sessions, hotspot interaction rate, and conversion to donation or ticket purchase.
Budgeting and Monetisation
The key cost drivers are: the number of 360-degree capture points, whether you need photogrammetry (3D object scanning) for individual artefacts, the complexity of the user interface and branding, the number of languages for audio guides or captions, and ongoing hosting and CDN costs. A basic walkthrough tour of a small permanent exhibition can be completed for a relatively modest investment; a multi-floor institution with interactive 3D artefact models and a multilingual audio guide will require significantly more. Always request itemised quotes from at least two vendors, and plan for a contingency buffer of 15–20 percent.
Legal and Conservation Requirements
Indonesian museums must navigate photography permits, especially for artefacts with cultural sensitivity or loan agreements with other institutions. Schedule capture sessions during closed hours to avoid crowds and minimise the risk of accidental artefact contact. Diffuse lighting rigs are essential for reducing glare and reflections on glass cases, lacquered surfaces, and metalwork—damage caused by improper lighting setups during a shoot is a conservator’s nightmare.
Choosing the Right Technology for Your Museum
Three main technology tiers serve different museum needs and budgets:
- 360-Degree Photo Walkthrough. The most affordable and fastest-to-produce option. A 360-degree camera (such as an Insta360 or Ricoh Theta) captures panoramic still images that are stitched together and linked via hotspot navigation. This is suitable for most gallery walkthroughs and provides an excellent starting point for institutions new to virtual tours.
- 3D Photogrammetry for Individual Artefacts. This technique uses dozens of overlapping photographs taken from multiple angles to reconstruct a three-dimensional model of an object. Visitors can rotate, zoom, and examine the artefact from any angle—ideal for highlight pieces such as Majapahit bronzes, Dayak ceremonial masks, or prehistoric stone tools. Photogrammetry capture is slower and more technically demanding than 360-degree shooting, and processing times are longer.
- Interactive VR Experience. The most immersive option, delivering a fully navigable virtual environment compatible with VR headsets as well as standard browsers. This tier is best suited for flagship exhibitions, permanent collection highlights, or institutions seeking a premium digital product that justifies paid access.
The Production Workflow: From Survey to Live Tour
A structured production workflow is the backbone of any successful museum virtual tour project. The six core phases are:
Phase 1 — Site Survey and Shot List
Walk the entire institution with a camera, floor plan, and notebook before any formal shoot begins. Mark every intended 360-degree capture point on the floor plan, plan the navigation paths between galleries, and identify the “hero” artefacts that warrant interactive hotspots or 3D scanning. A detailed shot list shared with the museum team prevents costly reshoots and ensures all stakeholders are aligned on scope.
Phase 2 — On-Site Capture
On shoot day, use a stable tripod and consistent white balance settings across all panoramas. Bracket exposures for HDR interior shots to handle the high contrast between naturally lit windows and darker gallery corners. For photogrammetry, take a minimum of 80–120 overlapping photographs per object, rotating around the artefact in a systematic pattern. Capture audio for the ambient soundscape if you plan to include an immersive audio layer.
Phase 3 — Post-Production
Stitching software assembles your raw 360-degree images into seamless panoramas. Remove the tripod from the nadir (bottom) of each panorama through cloning or patching. Apply colour correction to ensure consistency across all gallery spaces. For photogrammetry, process the overlapping photos through specialist software to generate the 3D mesh, then clean and optimise the model for real-time web delivery.
Phase 4 — Enrichment and Hotspot Mapping
This is where a raw panoramic walkthrough becomes a rich educational experience. Add navigational hotspots that link rooms together. Create information panels for key artefacts—title, provenance, date, accession number, and a short interpretive description. Embed audio guide segments, video clips of conservators discussing restoration processes, or external links to academic resources. If budget allows, add an AR overlay layer for visitors using mobile devices.
Phase 5 — Integration and QA
Embed the completed tour into your museum website via iframe or SDK. Test on a wide range of devices: Android phones, iPhones, tablets, desktop browsers (Chrome, Safari, Edge, Firefox), and if applicable, VR headsets. Verify that keyboard navigation is functional for accessibility, that all captions have corresponding transcripts, and that page loading times are acceptable on a 4G mobile connection. Install analytics tracking—at minimum, GA4 event tracking for hotspot interactions and session duration—before going live.
Phase 6 — Launch and Maintenance
Consider a soft launch with a pilot group (teachers, local journalists, accessibility advocates) before full public release. Gather feedback and iterate quickly. After launch, establish a maintenance schedule: update hotspot content when exhibitions change, refresh audio guides when new scholarship emerges, and monitor analytics monthly to identify drop-off points in the tour navigation.
Realistic Timelines for Museum Virtual Tour Projects
Timeline depends heavily on the scope of the institution and the complexity of the experience:
- Small MVP (single gallery, 5–10 capture points, basic hotspots): 4–6 weeks from brief to launch.
- Medium scope (multi-gallery, 20–40 capture points, some 3D artefacts, custom UI): 8–12 weeks.
- Large/immersive (full institution, 50+ capture points, extensive photogrammetry, multilingual audio, VR mode): 12–20 weeks or more.
These estimates assume a responsive museum team who can approve deliverables within 48–72 hours at each milestone. Delays in stakeholder sign-off are the most common source of schedule overrun.
Implementation Best Practices and Common Pitfalls
Several lessons from successful Indonesian virtual tour projects apply universally:
- Control lighting carefully. Reflections on glass display cases and metallic artefacts are the most common quality issue in museum virtual tours. Use polarising filters and diffuse LED panels rather than direct flash.
- Design for mobile first. The majority of Indonesian internet users access the web on smartphones. Compress master panorama files and serve resolution-adaptive versions via CDN to ensure fast loading on mobile connections.
- Include multilingual content from the start. If you plan to serve international audiences, build the content management structure to support multiple languages before launch—retrofitting multilingual support later is significantly more expensive.
- Make accessibility non-negotiable. Full keyboard navigation, descriptive alt text on all hotspots, and audio transcripts are baseline requirements, not optional extras.
- Set up analytics before going live. Without a tracking baseline established from day one, you cannot measure the impact of optimisations made after launch.
Ready to Build Your Museum Virtual Tour?
InReality Solutions has delivered immersive virtual tour experiences for cultural, educational, and commercial clients across Indonesia. Our end-to-end service covers site survey, 360-degree and photogrammetry capture, post-production, hotspot enrichment, and web integration—with full support for mobile optimisation and analytics setup.
Explore our virtual tour services to see examples of our work, or contact our team to discuss your museum’s project scope, timeline, and budget. We offer a free initial consultation and can provide a detailed project brief and cost estimate within five business days.
Frequently Asked Questions
How much does it cost to create a museum virtual tour in Indonesia?
Costs vary significantly based on scope. A basic 360-degree walkthrough of a small gallery (5–10 capture points, standard hotspots, no custom UI) is the most affordable tier. A large institution with extensive photogrammetry, multilingual audio guides, and a custom-branded interface will cost considerably more. Request itemised quotes from vendors and build in a 15–20 percent contingency. InReality Solutions offers free consultations to help you define scope and obtain an accurate estimate.
What is the difference between a 360-degree virtual tour and a 3D photogrammetry model?
A 360-degree virtual tour is a linked series of panoramic still images that visitors navigate between, giving a walkthrough experience of rooms and galleries. Photogrammetry produces a fully rotatable 3D model of an individual object—such as a ceramic vessel or a bronze statue—that visitors can examine from any angle. Museums typically combine both technologies: 360-degree panoramas for gallery navigation and photogrammetry for highlight artefacts.
How long does it take to build a museum virtual tour?
A small MVP (one gallery, basic hotspots) typically takes 4–6 weeks from brief to launch. A medium-scope project across multiple galleries with some 3D artefact models takes 8–12 weeks. A large, immersive experience for a full institution can take 12–20 weeks or more. Prompt stakeholder feedback and approvals at each milestone are the biggest factors in keeping projects on schedule.
Can a virtual tour be integrated into an existing museum website?
Yes. The most common integration method is via iframe embed—you simply paste a code snippet into your existing CMS, whether it runs on WordPress, Drupal, or a custom platform. More sophisticated integrations using SDKs or APIs are also available, enabling deeper functionality such as single sign-on for paid access or direct booking links within the tour.
How do we measure the success of a museum virtual tour?
Key metrics to track include: average session duration on the tour page (a proxy for engagement depth), unique monthly tour sessions, hotspot interaction rate (which artefacts attract the most interest), conversion to donation or ticket purchase, and return visitor rate. Set up GA4 event tracking before launch so you have a baseline from day one.
Founder & Managing Director · LinkedIn
Ready to Build Your New Reality?
Tell us about your brand and goals — we'll show you what's possible.